


The Language of Visual Storytelling: Camera Angles & Camera Heights

In our last issue you learned what the main shot sizes are, and how you can use them to enhance the emotional impact of your stories.
Today, I’ll teach you how to use 2 more powerful tools of the Language of Visual Storytelling: Camera Angles and Camera Heights.
Camera heights and camera angles work together to evoke specific emotions in your viewer.
As you might have guessed, most shots in a movie are taken by a camera set at eye-level, and with the camera’s lens pointing straight ahead: this is the LEVEL ANGLE.
The reason this is the most commonly used combination of camera height and camera angle in cinema is that it feels really natural, since this is the way we perceive the world and the people immediately in front of us through our own eyes.
This is especially true in conversations.
Sometimes though, we meet a person so tall that we must tilt our heads up; we need to“look up” to them, in order to establish eye contact.
If you think about it, on those occasions we tend to feel a little bit intimidated by the physical presence of this tall person.
This is more of a gut feeling, an instinctive feeling that’s difficult to shake, even when we know we’re safe.
This happens because our brain is wired to assess threats in the environment, and a taller individual is perceived by our brain as a stronger opponent and, as such, as a possible threat.
This is why a LOW ANGLE –the cinematography term for when the camera is tilting up to mimic this situation– is an excellent way to make the spectator feel small, and whatever (or whoever) the camera is looking up to feel imposing, powerful, and even threatening.
The opposite is true for a HIGH ANGLE: the camera tilts down giving us, in turn, the experience of being that tall person who’s looking down on the small person.
This camera angle makes the subject in front of the camera feel small and vulnerable.
We can also play with the height of the camera to make this effect more extreme.
For instance, if we take the camera down, let’s say, to the eye-level of a child, and really tilt it up to establish eye contact with an adult, then this person REALLY will appear imposing and powerful, and honestly, quite intimidating from this low-angle perspective!
We could go the opposite way, and raise the camera higher to exacerbate the feeling of impotence and weakness the viewer gets from a high-angle perspective.
And of course, we can also use high angles and low angles with the camera focused on other objects or structures such as buildings, mountains, etc., and not just on people.
It’s quite common for the camera to go from eye level to dramatically tilting up into an EXTREME LOW-ANGLE shot to show, for instance, the magnitude of a tall building or structure that dwarfs the character and, which them, us as viewers, making us feel really small in comparison.
It’s also pretty common to transition from a POV –point-of-view– shot where we’re “seeing through the character’s eyes” using a LEVEL ANGLE, to an EXTREME HIGH-ANGLE where the camera tilts down dramatically to reveal a deep canyon at their feet, a precipice, or simply the street as viewed by the character from a really tall building.
These kinds of shots create a feeling of vertigo, insignificance, and even imminent danger in the viewer!
There is also a special case of this kind of extreme high-angle shot that is usually used as the establishing shots we usually see at the start of a movie, where the city or region where the action will happen is shown from really high above.
This shot is usually referred to as a “bird's-eye” shot, or a “drone shot” since nowadays these shots are usually captured by drones (traditionally, they were captured from helicopters).
These are just three common examples of how different shot sizes, camera angles, and camera movements can be combined to create a dramatic emotional impact on the spectator.
That’s why I consider these cinematography devices “the letters” of the language of Visual Storytelling: once you’ve learned them by heart, you can combine them in infinite ways not only to tell stories visually, but, more importantly, to evoke the exact kind of emotions you want to create in your viewers!
Finally, there is another camera angle that is widely used in cinema, though not as commonly as the camera angles we have described so far: the so-called DUTCH ANGLE.
This angle is quite different because in this case, the camera is tilted left or right with respect to the lens axis. This creates a feeling of uneasiness, the sensation that something is wrong, that something bad is about to happen, and, in extreme cases, of madness.
So here’s a cheatsheet of the most commonly used Camera Angles in cinema:
Level Angle: Camera is straight, horizon is flat. Neutral feeling.
Low Angle (Tilting Up): Camera tilted upwards, looking up at the subject. Makes the subject look bigger/more powerful.
High Angle (Tilting Down): Camera tilted downwards, looking down at the subject. Makes the subject look smaller/vulnerable.
Bird's-eye View Angle: An extreme High Angle looking almost straight down from directly above. Makes the subjects look like patterns in the distance, or small objects in a vast landscape.
Dutch Angle (Dutch Tilt or Canted Angle): Camera tilted sideways. Creates unease or disorientation.
Ok, time to get our hands dirty and try some of these shots!
For the prompt, I’ll use this really simple one as a base:
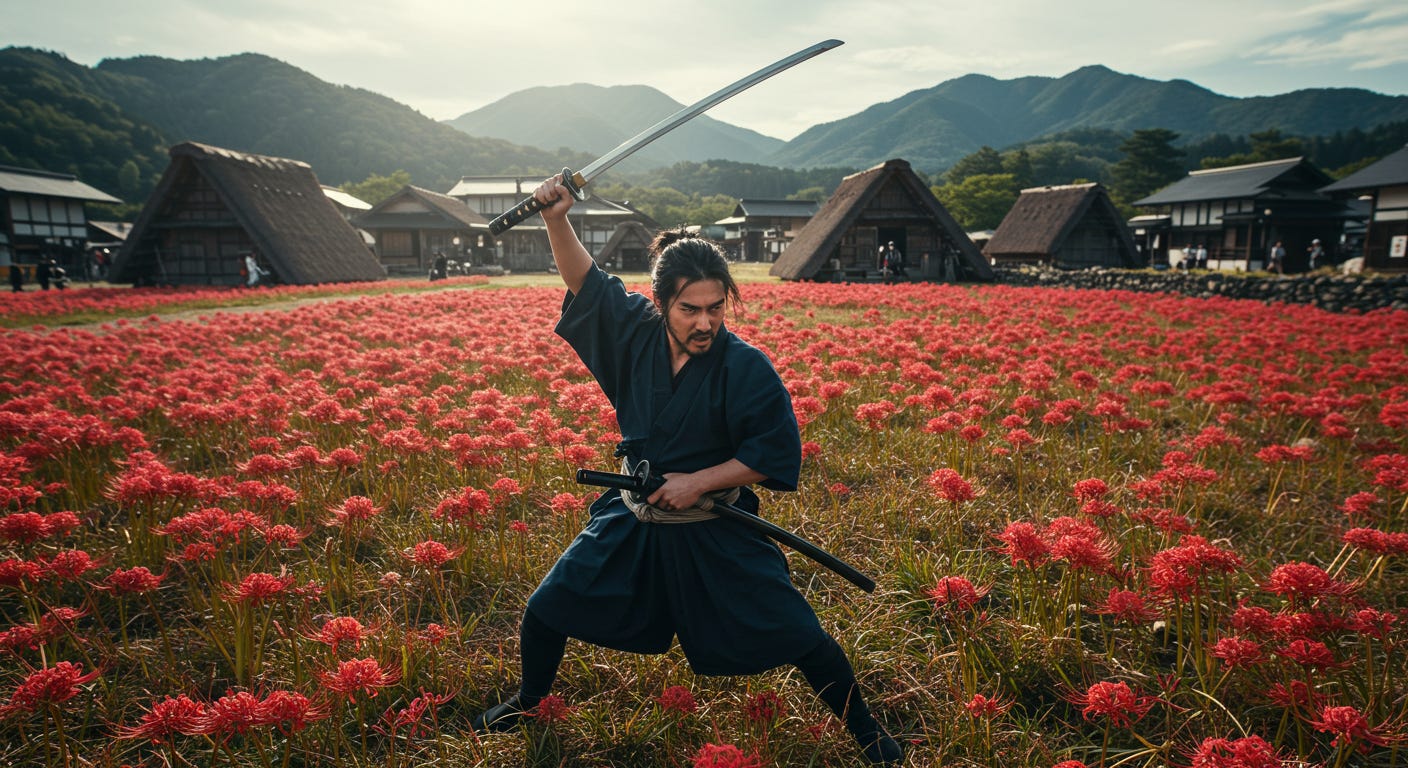
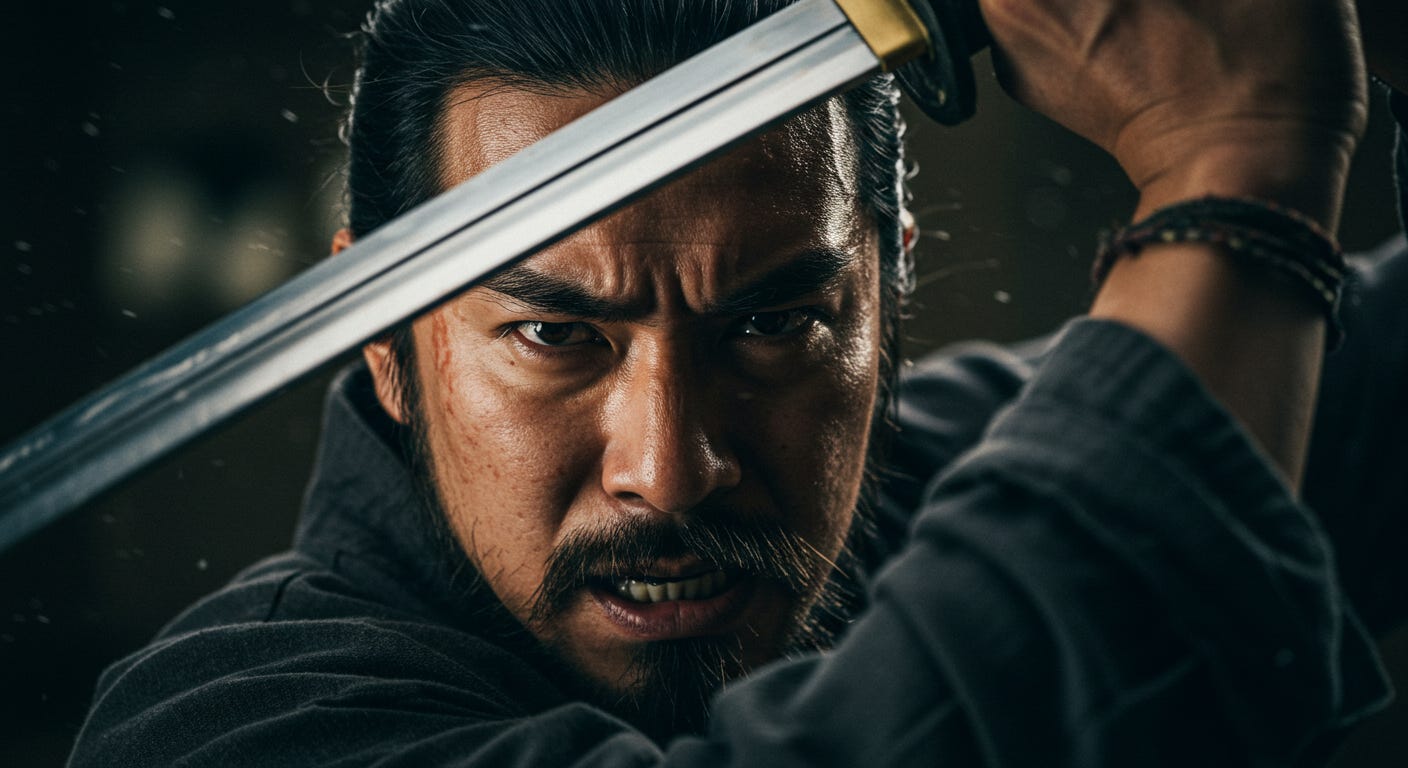
A fierce looking samurai, holding his katana over his head in a fight stance and ready for battle. Realistic photo, cinematic composition.
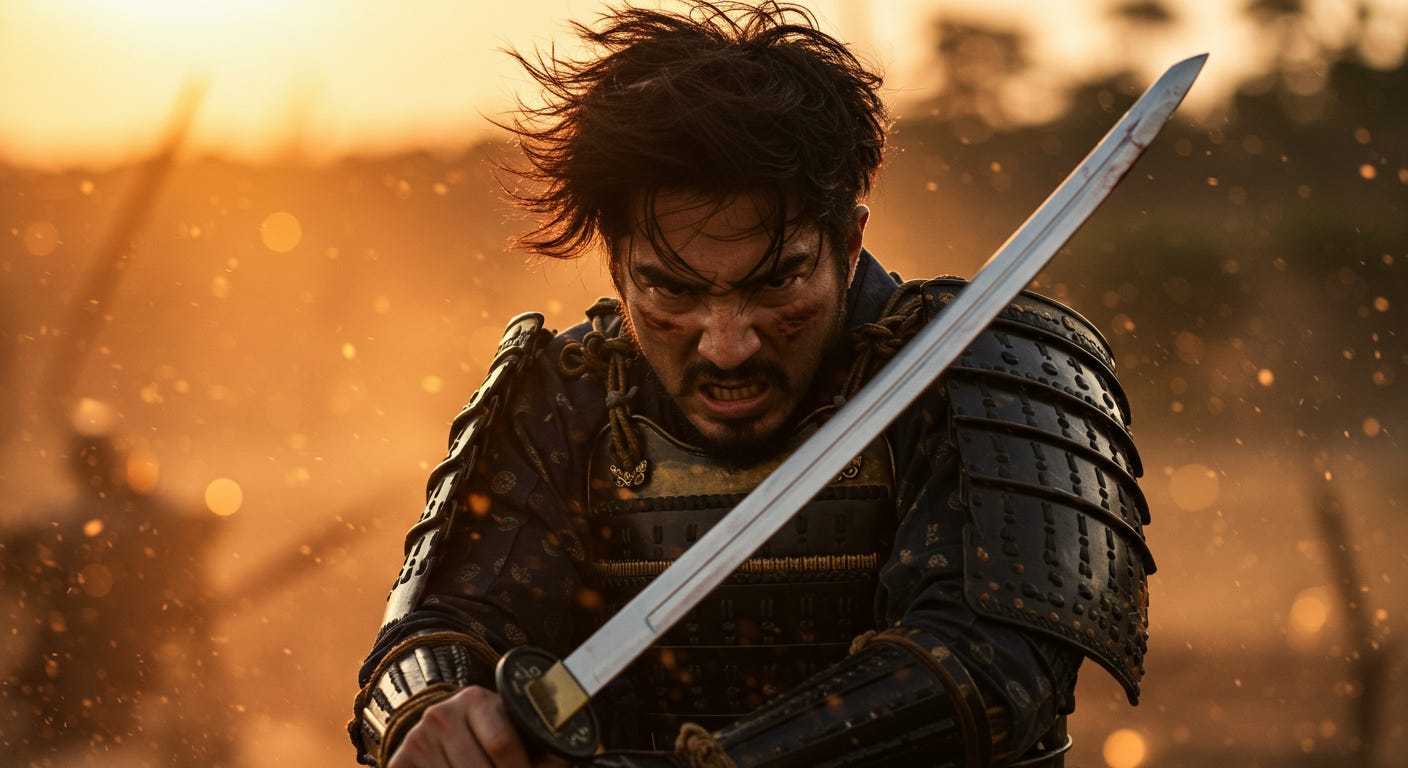
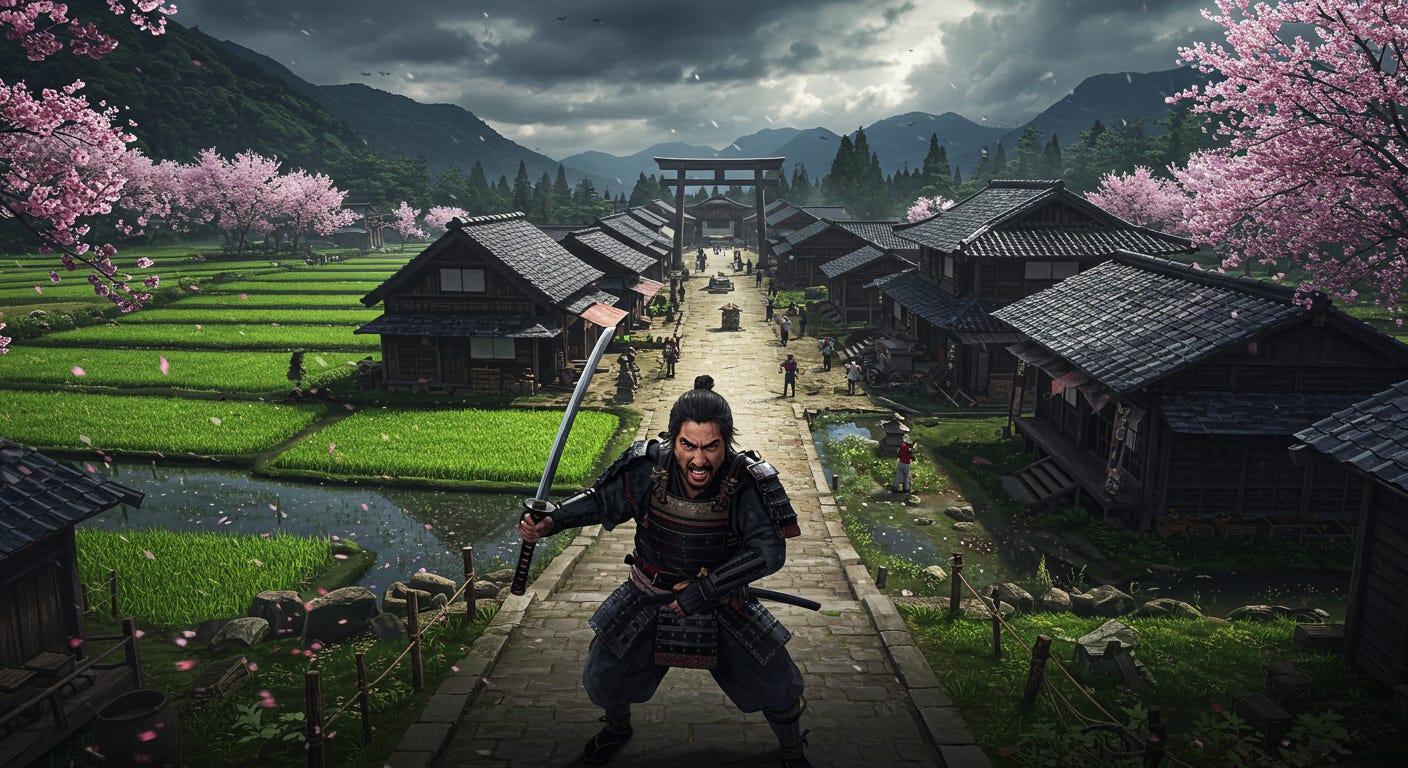
Let’s run it with Image 3 on Google’s ImageFX platform, without any further creative direction, to get a baseline:
As an Aikido practitioner, it pains me the way he’s holding the katana… but besides that, I think it’s a pretty decent frame. I really like his fierce expression!
So with that as a base, let’s now try to make it appear more intimidating with a low-angle shot.
QUICK TIP: I always used to get confused with the terms “low angle” and “high angle”; they are quite ambiguous to me. So I came up with a little hack to help me remember which is which:
A LOW Angle shot is a shot FROM LOW to High, and a HIGH Angle shot is a shot FROM HIGH to Low. Hope it helps!
Let’s use this prompt:
A fierce looking samurai, holding his katana over his head in a fight stance and ready for battle. Low angle shot, cinematic composition.
After rolling this prompt a couple times, I got some really impressive shots, but almost none of them are low-angle shots.
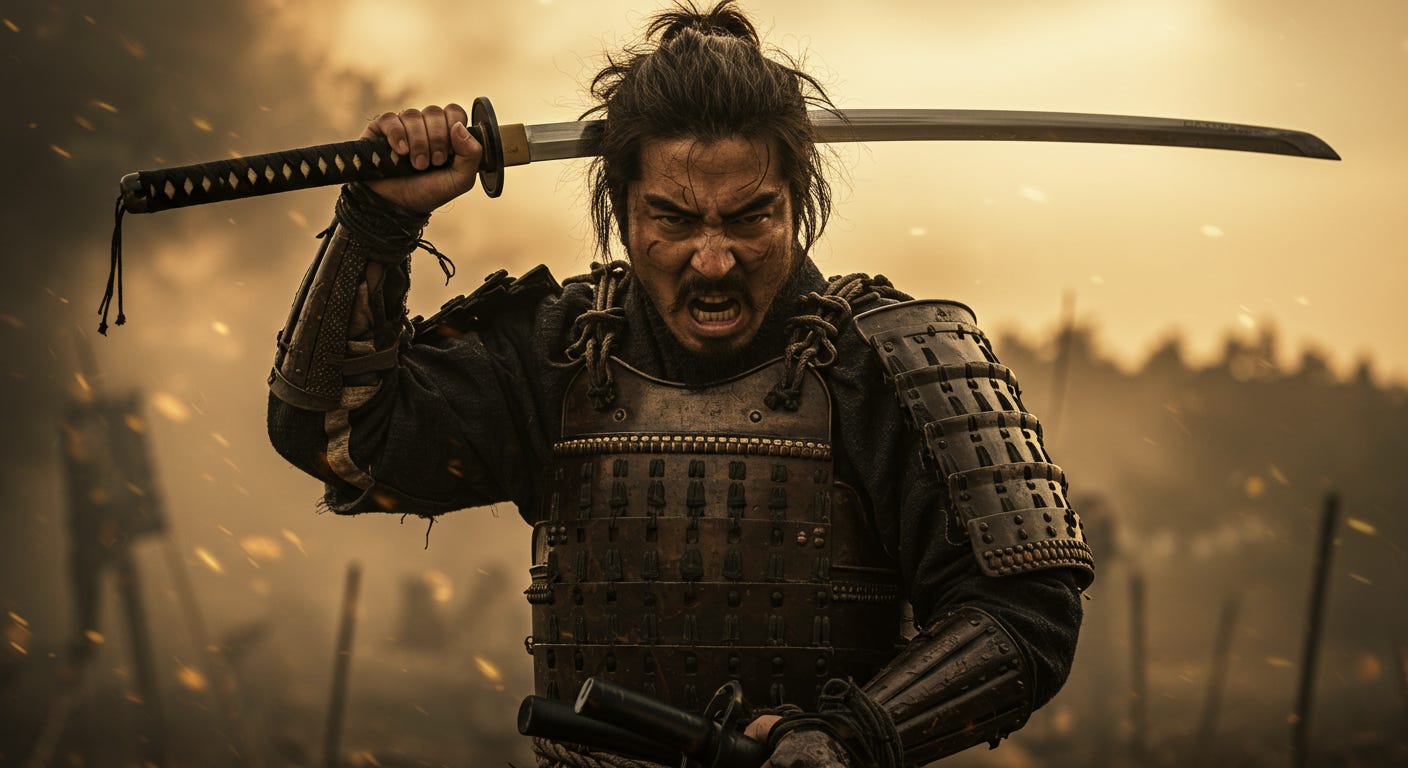
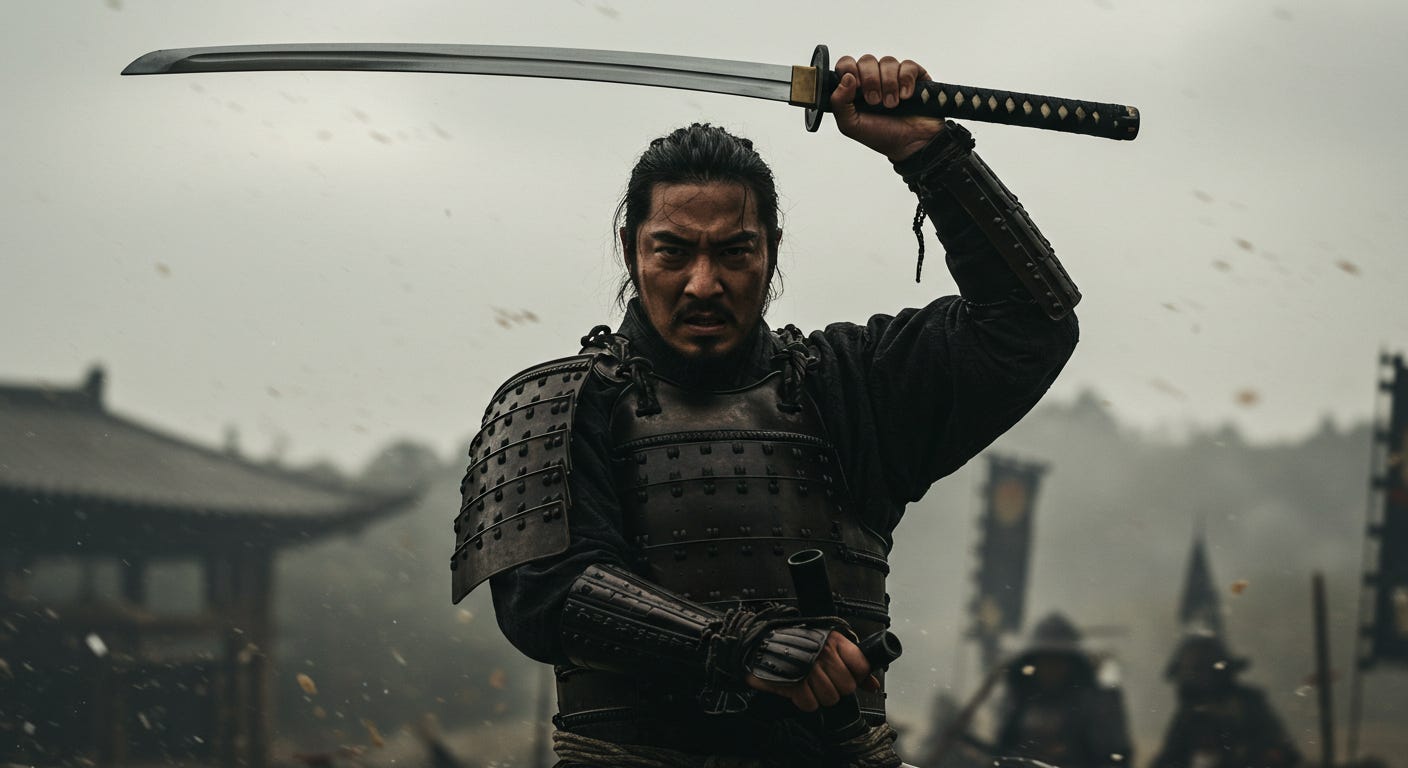
Only this one qualifies as a low-angle:
Notice the feeling of being in front of an intimidating presence!
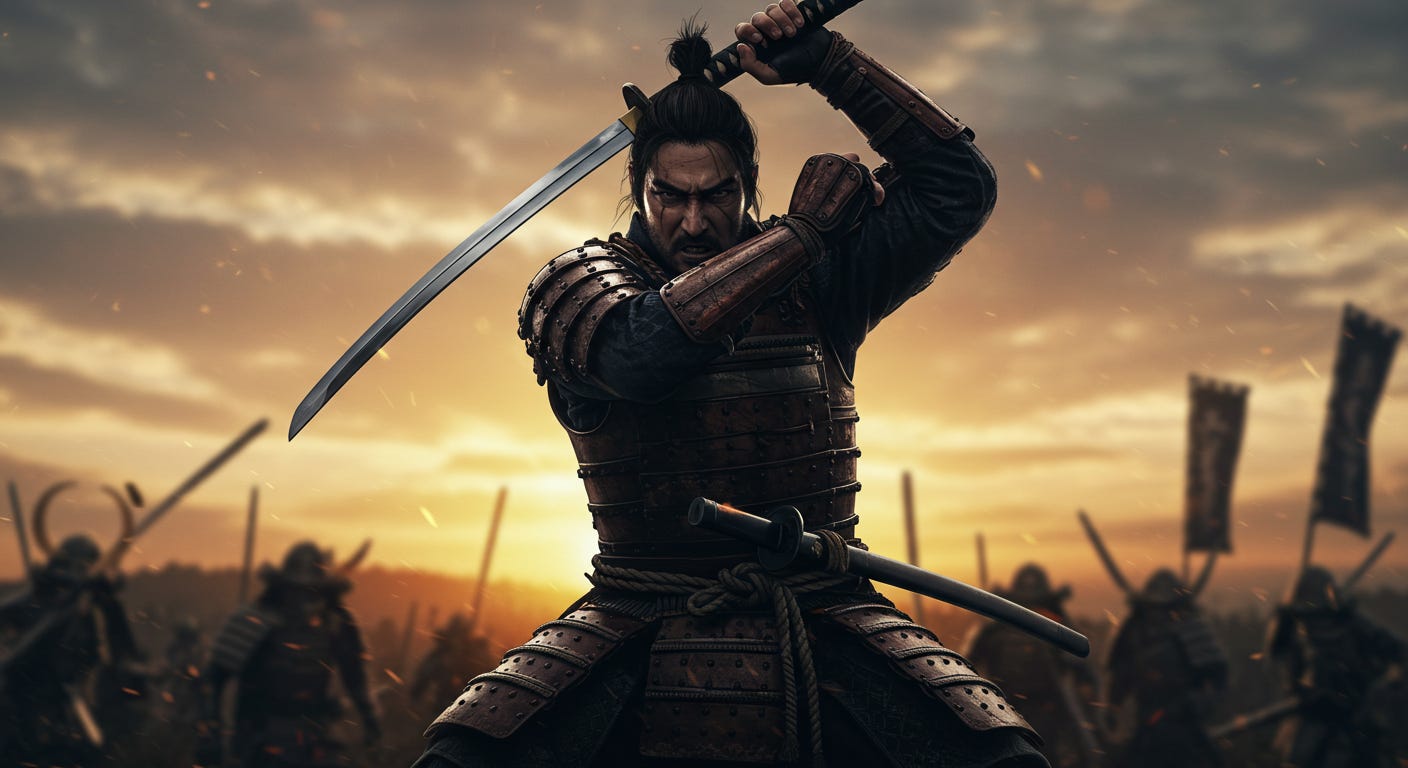
This is another great shot that might qualify as a slight low angle:

As you can see, the level of quality of Imagen 3 is just outstanding for these kinds of cinematic shots!
But the weight of keywords like “low-angle shot” seems to be quite limited.
Even prompting for “extreme low-angle shot” will give you an eye-level shot most of the time!
This is a good one I got using “extreme low-angle shot”:

As always, it takes experimentation with your prompts.
It’s also useful to remember that, at the time of this writing, most image generation models haven’t really been trained to follow cinematography direction terms, so it’s usually a good idea to try language that explains what we want in plain English.
For instance, this is one of the shots I got when using “the camera looks up”, instead of “extreme low angle”:
Now, when I reinforce the concept using both the keyword and the description of the camera's position, I get low-angles in most generations.
Like this one:
Or even this one:
This is the prompt I used:
A fierce looking samurai, holding his katana over his head in a fight stance and ready for battle. The camera looks up, low-angle, cinematic composition.
Let’s move on now to a high angle…
Knowing what we know, I’ll use the reinforced prompt strategy from the get-go:
A fierce looking samurai, holding his katana over his head in a fight stance and ready for battle. The camera looks down, high-angle, cinematic composition.
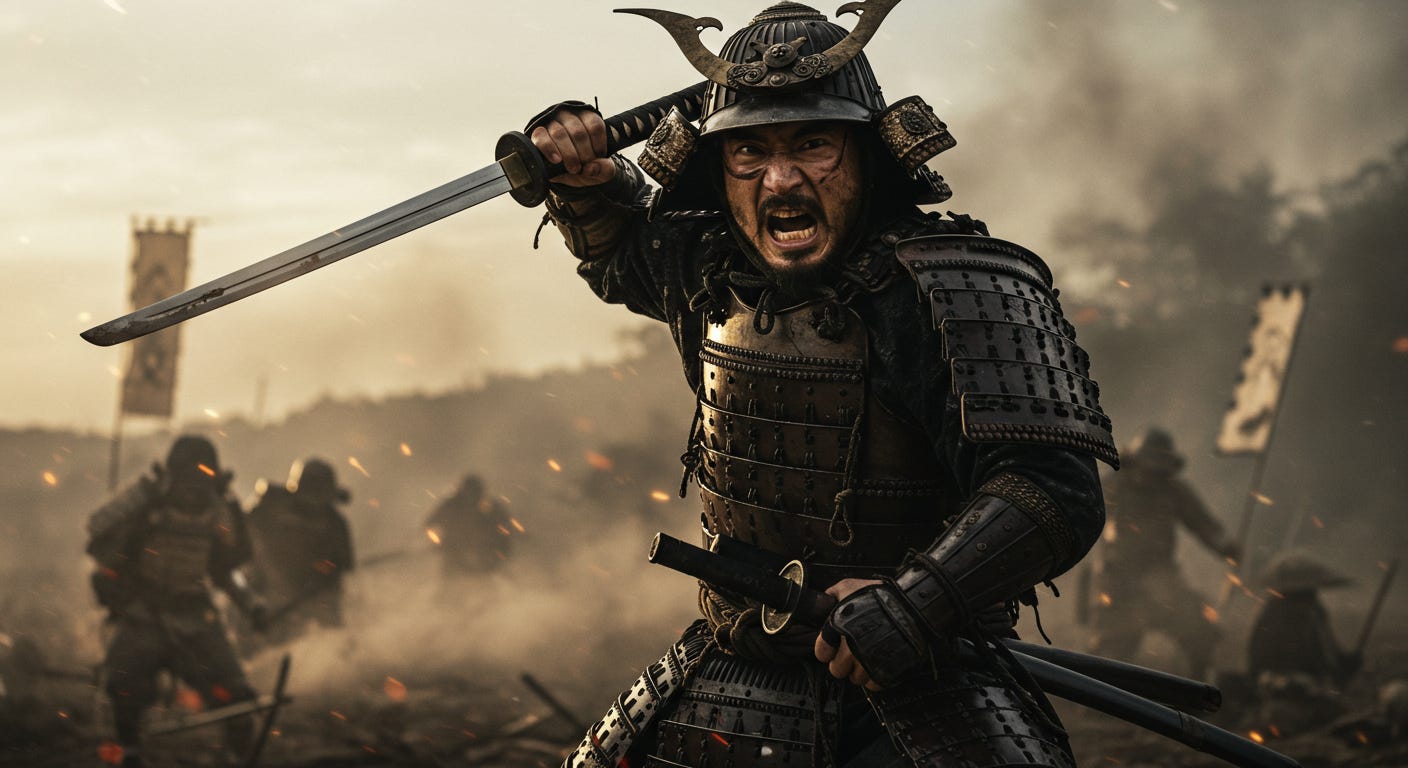
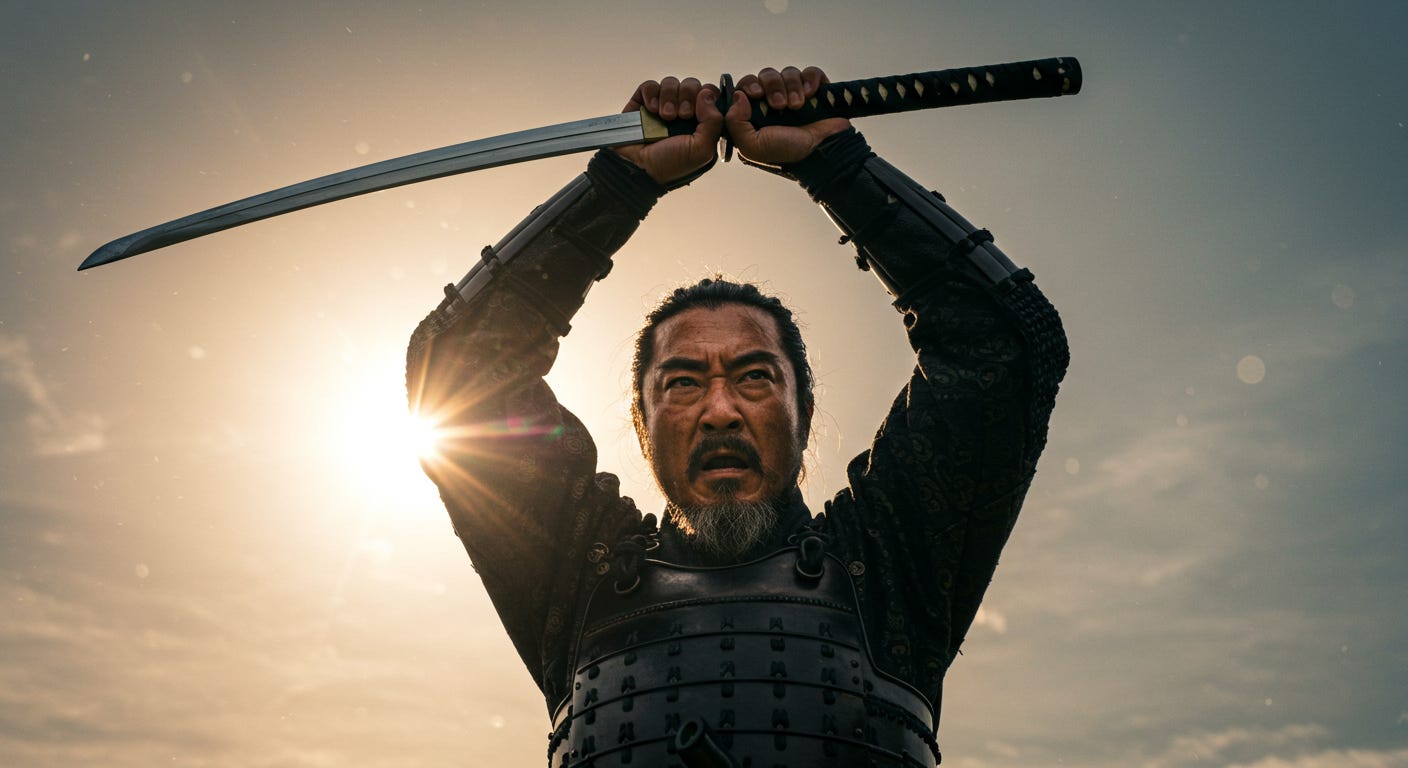
As usual, I got some eye-level shots despite my instructions, but this time at least, 50% of the generations were proper high angles!
Here’s one, which also happens to be a wide shot –great for an establishing shot:
And my favorite one:
Ok… but what about a bird’s-eye shot?
For that we’ll need to alter the prompt a tiny bit, but I’ll try to keep the changes to the bare minimum, simply adding some references to the environment.
Let’s start with:
A bird’s eye shot showing a small Japanese village. A fierce looking samurai, holding his katana over his head in a fight stance and ready for battle. cinematic composition.
As expected, I got super unrealistic results. Like this one:
There are several reasons for this.
First, I didn’t really describe the village at all, and left it to the model’s imagination. Lazy direction, lazy results!
But the worst part is, of course, that the samurai is completely out of proportion!
This is entirely our fault: we included in the prompt details such as “a fierce looking samurai” that suggest facial expressions… in a bird’s-eye shot that cannot, realistically, show that!
In consequence, the model had to blow the samurai out of proportion to try to accommodate what we asked for!
So let’s use some common sense and imagination of our own to provide better art direction:
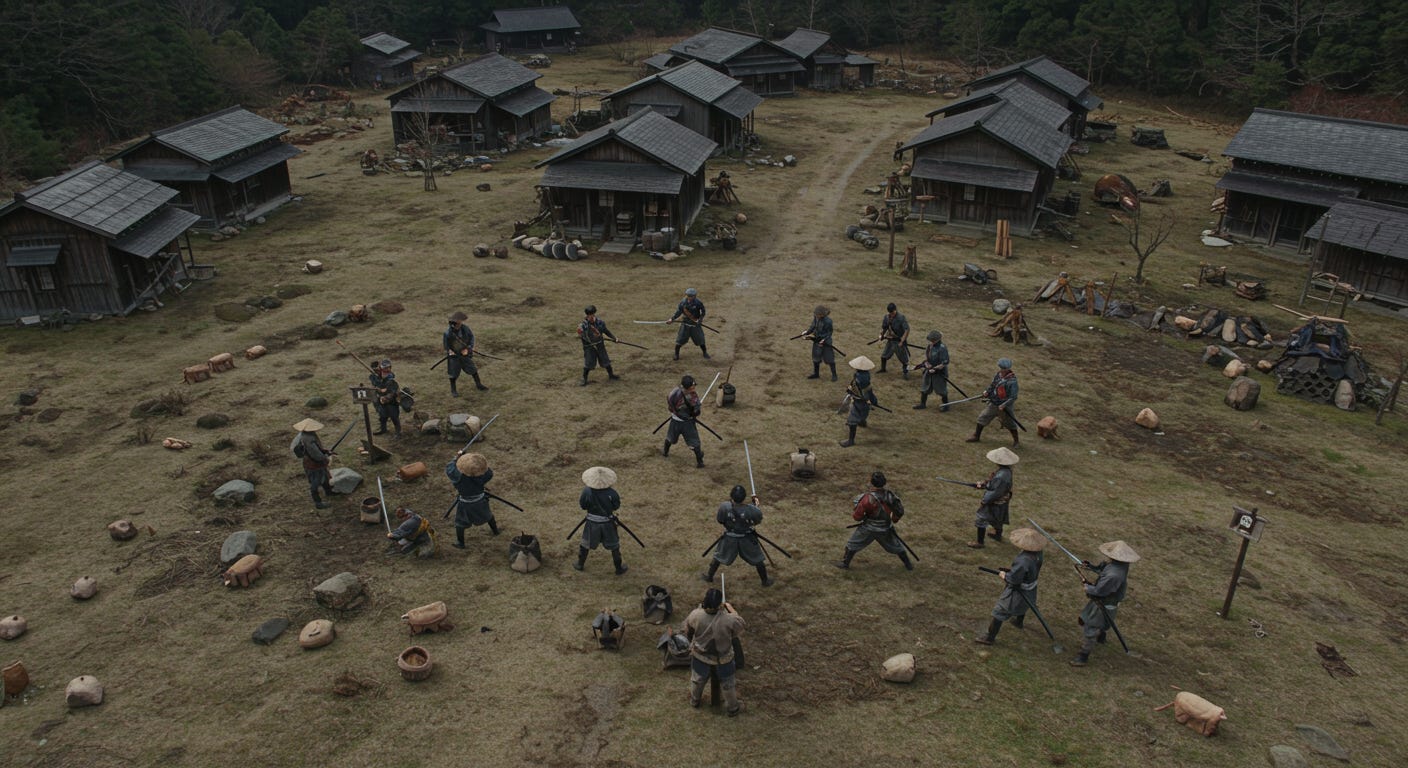
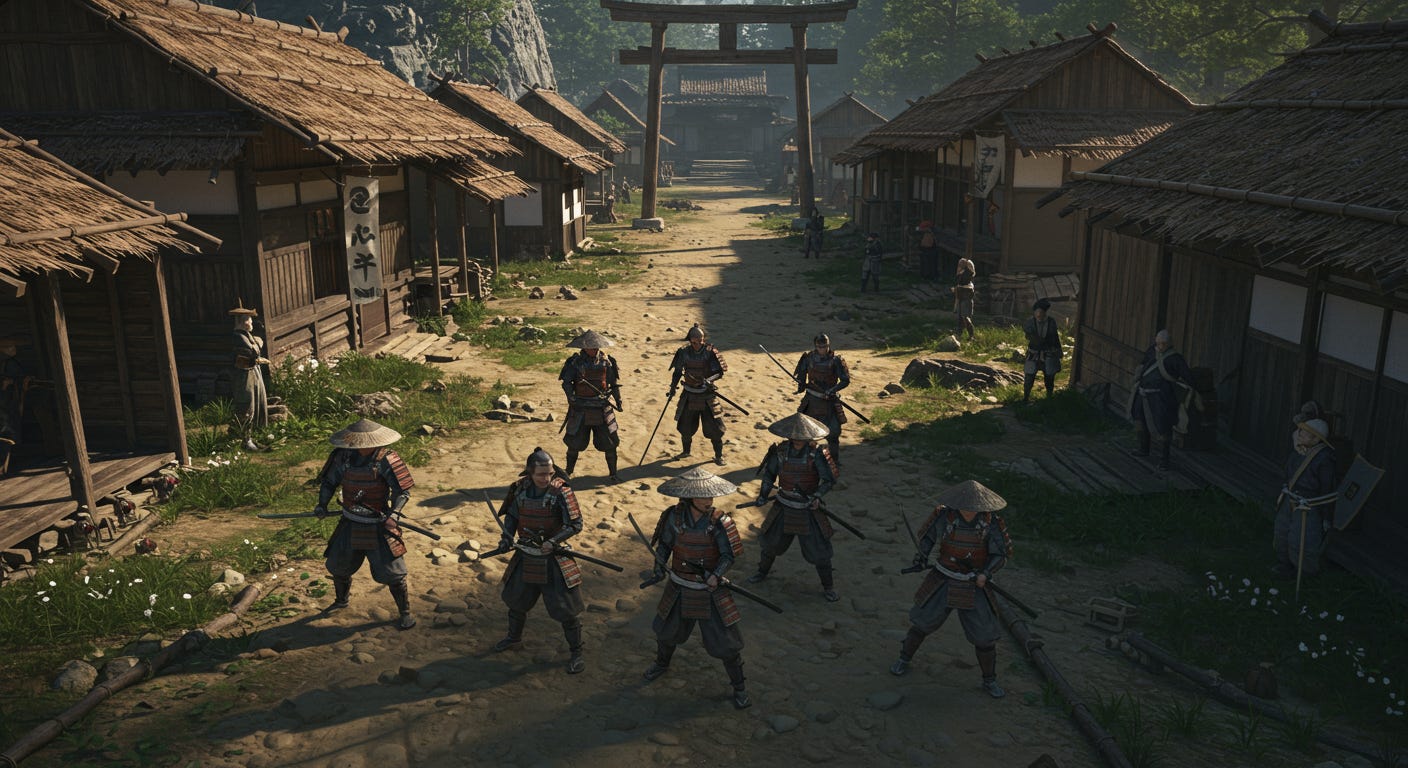
A bird’s eye shot showing a small traditional Japanese village. a small group of samurais is defending the village against other samurais trying to destroy it. Cinematic composition, high-action.
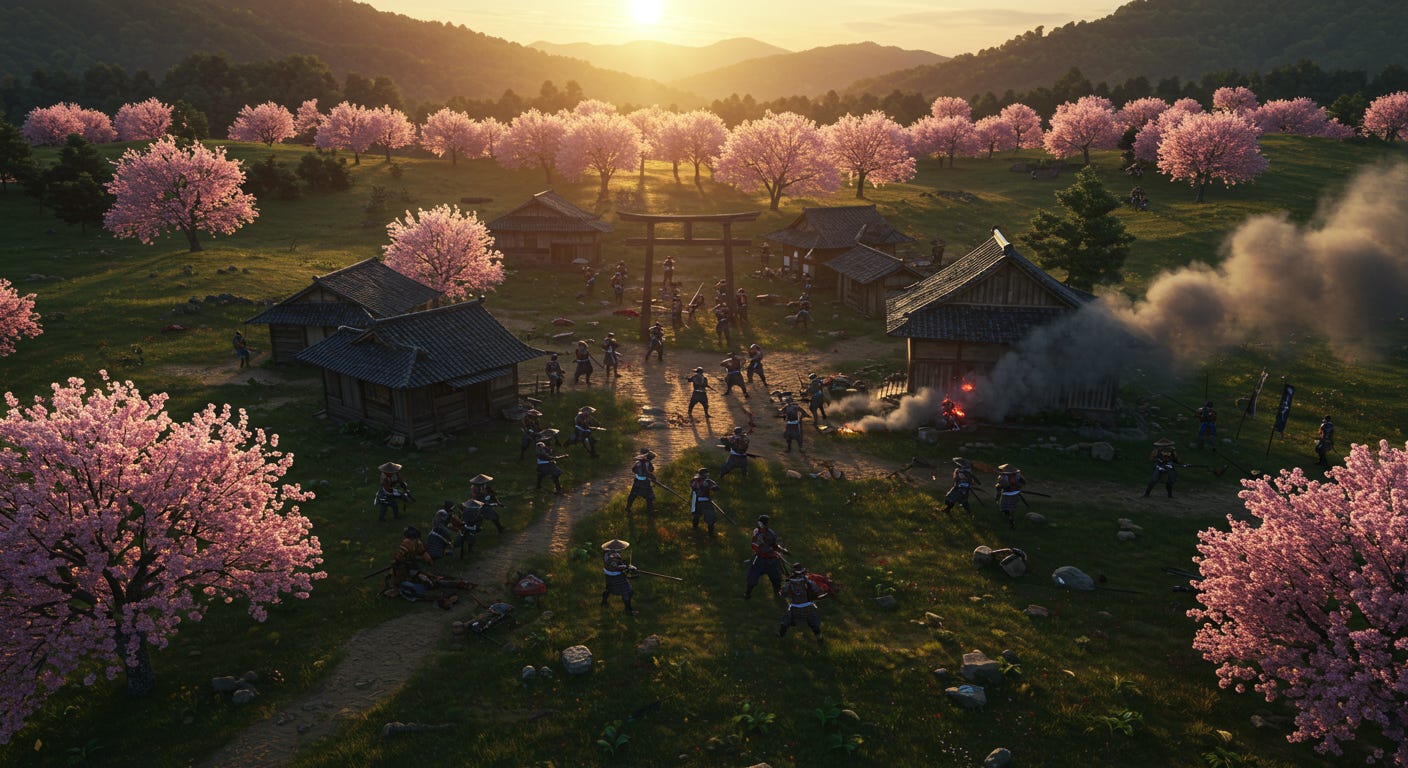
Ok, not bad.
These shots don’t really look realistic, have more of a video-game vibe to them, but they’re definitely bird’s-eye shots.
We can always improve our prompt if we want to get more realistic results:
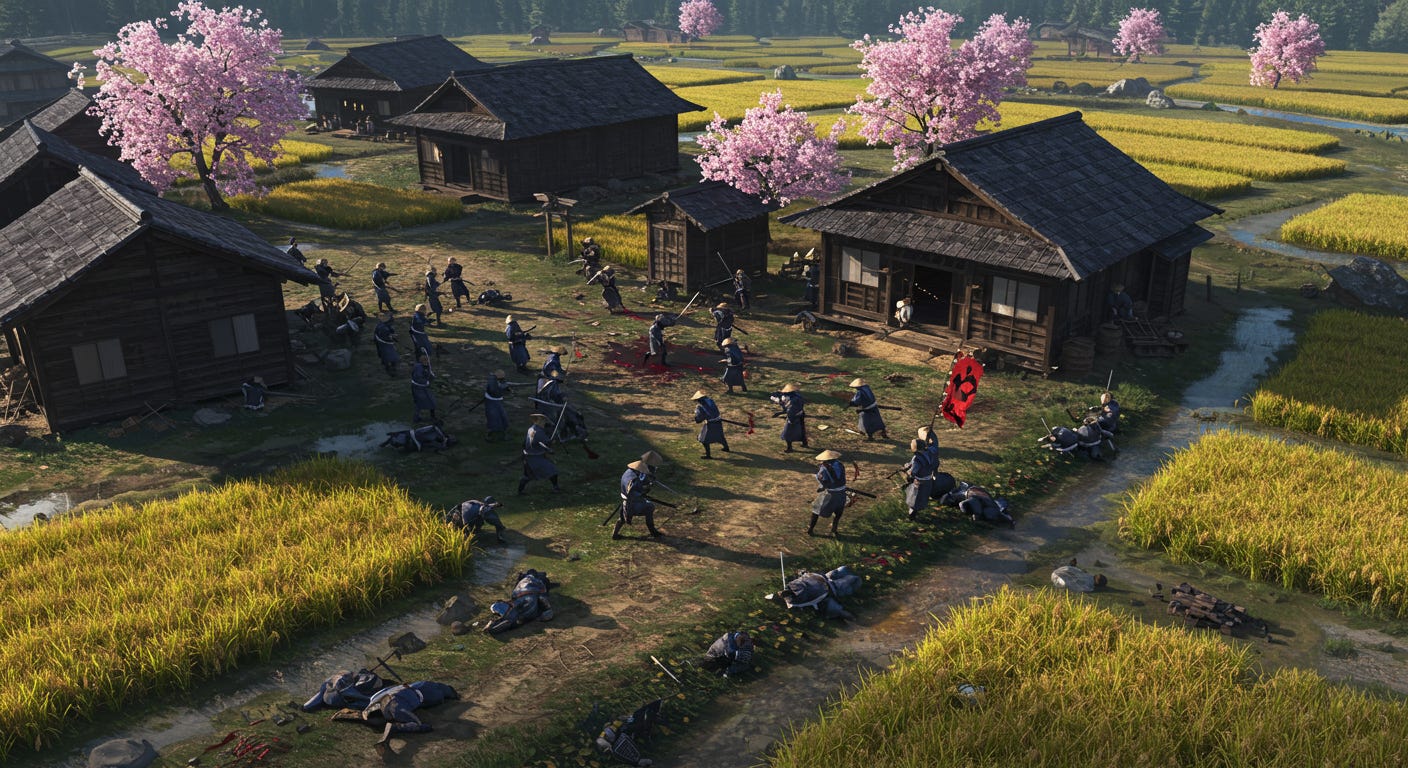
Massaging the prompt a bit gives us, as expected, much more realistic results:
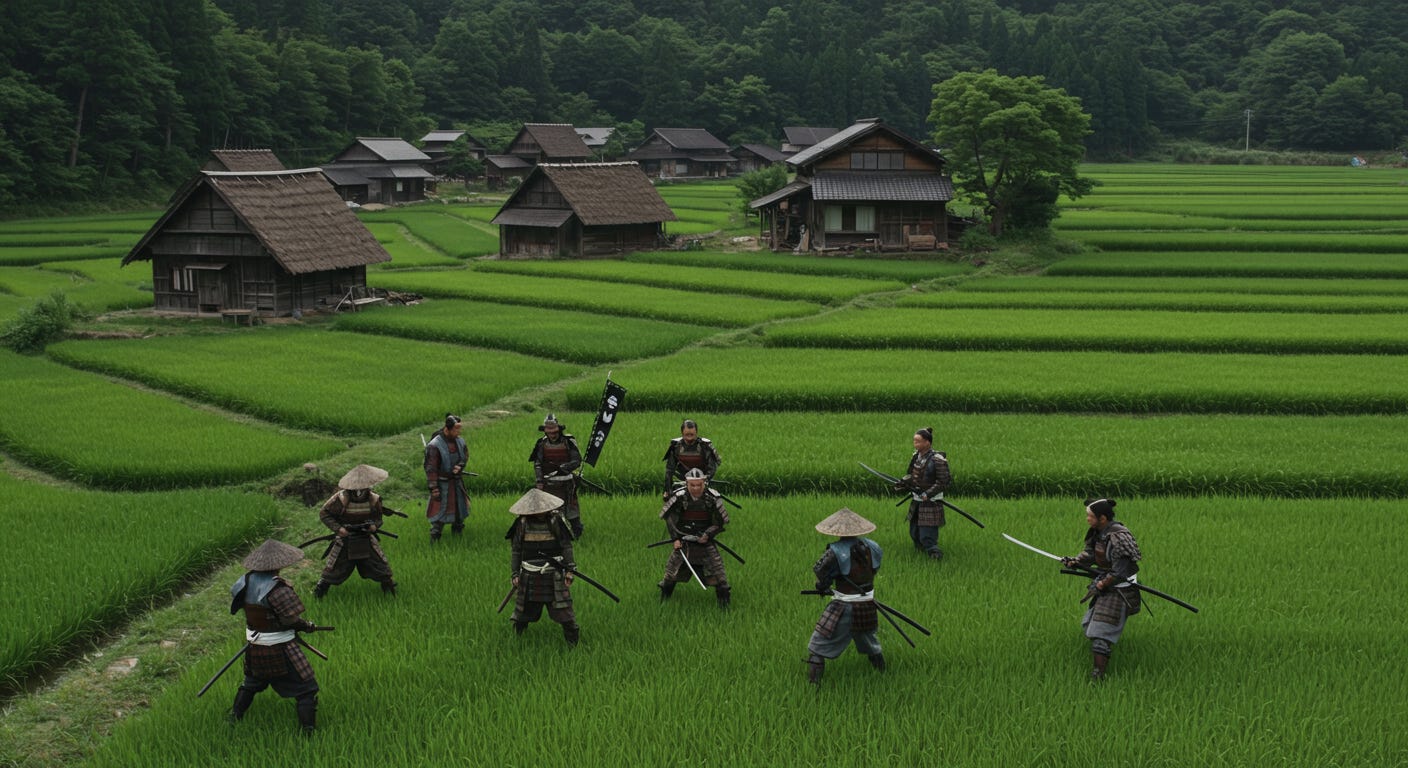
A bird's eye shot from high in the sky over a small traditional Japanese village shows a small group of samurais wielding their swords and ready for battle. Cinematic composition, ultra-wide angle, realistic photography, high-action.
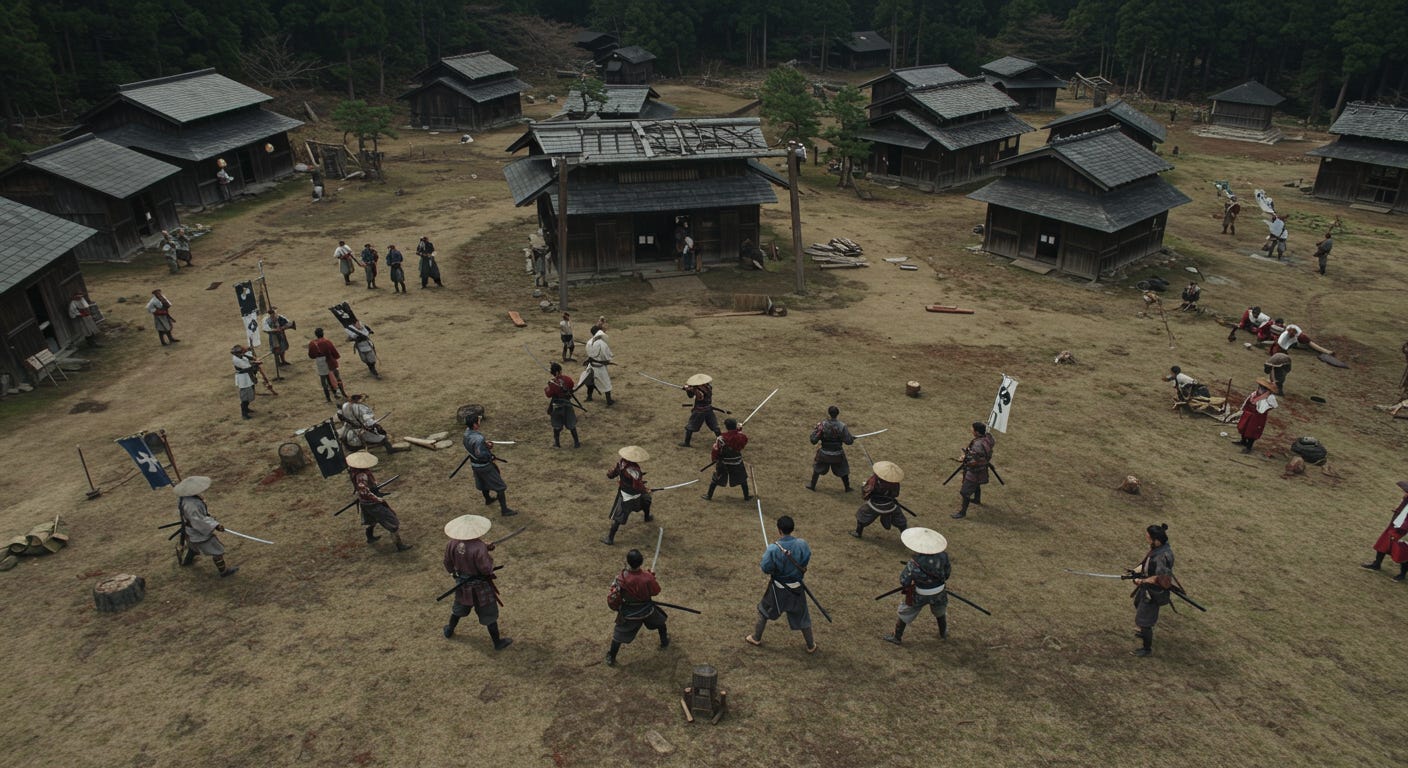
We can also use “drone shot” here for a different, often more dynamic shot angle:
A drone shot over a small traditional Japanese village shows a small group of samurais wielding their swords and ready for battle. Cinematic composition, ultra-wide angle, realistic photography, high-action.
These all came out great:
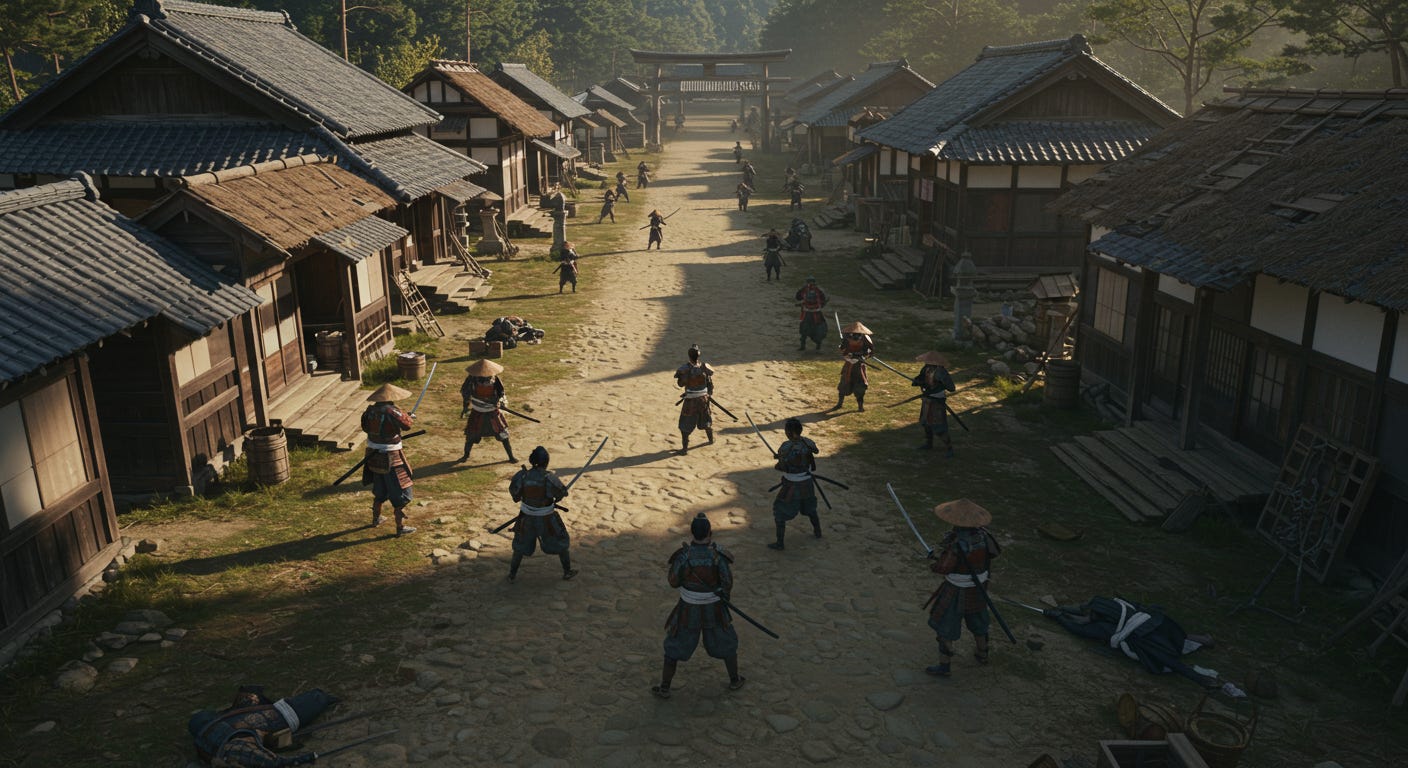
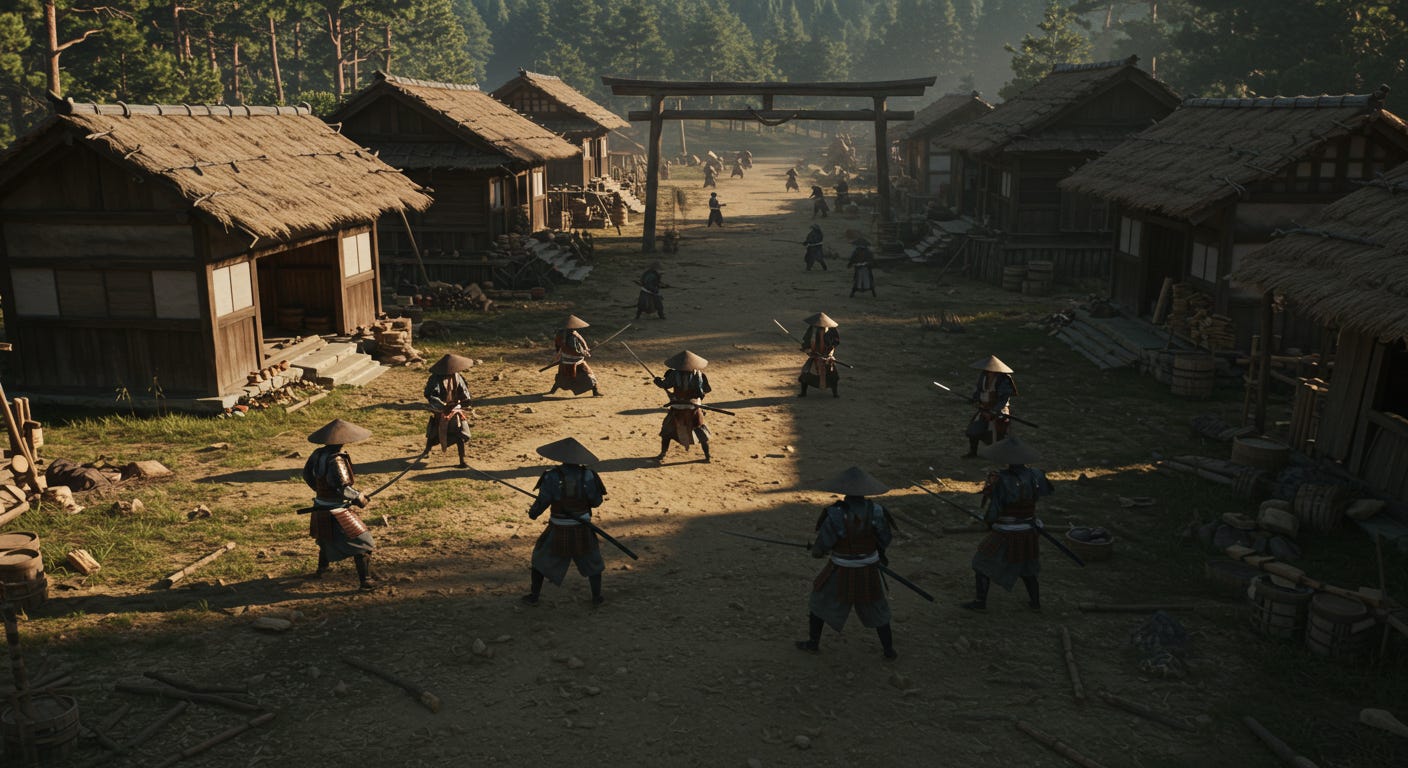
And my favorite:
As you can see, taking the time to improve your prompts, even if only slightly, and providing a little more art direction to the model, can make a huge difference in the quality of the final result!
Let’s now go back to our lonely samurai from the beginning and try something different:
A fierce looking samurai, holding his katana over his head in a fight stance and ready for battle. The camera tilted to the left, dutch-angle, cinematic composition.
I rolled this prompt a couple of times, and even when I got impressive shots, NONE of them was a dutch angle!
It doesn’t look like Imagen 3 understands what a Dutch Angle is…
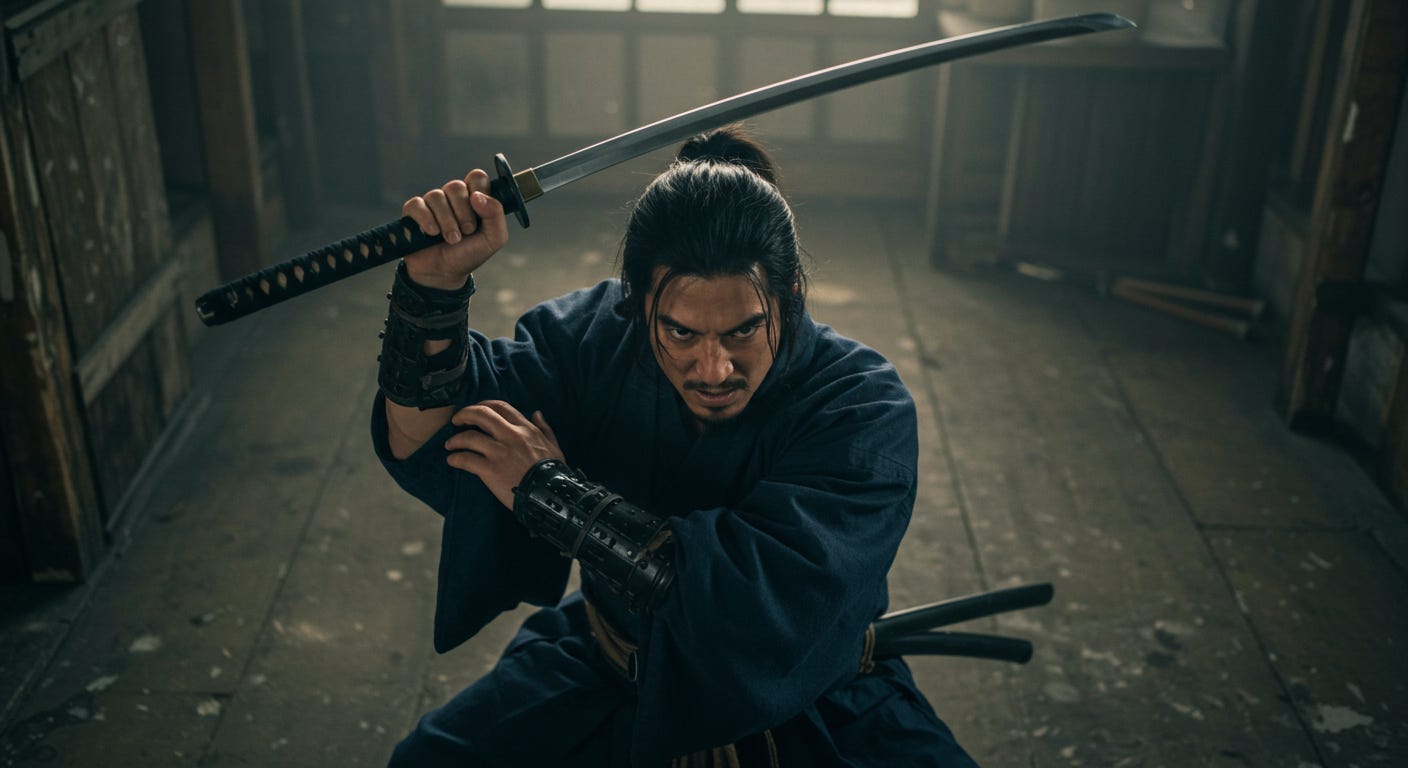
But let’s try again using a close-up, since dutch angles are more commonly used with close-ups:
A close-up on the face of a fierce looking samurai, holding his katana over his head in a fight stance and ready for battle. The camera tilts to the left, dutch-angle, cinematic composition.
Great close-up, sure. But most definitely NOT a dutch angle shot:
At this point, we could keep trying to describe what a dutch angle is, and reinforce it using different keywords that refer to this kind of shot.
But honestly, this shot is so easy to fake in post-production that it’s not worth it.
All it takes is zooming in a bit on a shot you like, and then slightly rotating it left or right.
For instance, I really like that close-up above, so in less than a minute I made it into a dutch-angle extreme close-up:

It adds to the fierce look, doesn’t it?
You don’t need any fancy software to do this, by the way: I just used the free version of Canva to open the image and rotate it counter-clockwise, like so:

To do this, you need to blow the image up first, in order to hide the corners.
That’s why I knew in advance that our close-up framing would become an extreme close-up.
But that’s not really a problem, since you can always use AI to extend the frame before cropping in. It’s just easier this way.
As a side note, this is one of the reasons why editors like to have the raw video files in 4k quality or better.
This gives them the freedom to use similar tricks to “fabricate” some shots in post-production, even if they weren’t part of the coverage.
COVERAGE: A film production term that refers to all the shots recorded by the cameras during production.
This concept implies having each scene and take shot by different cameras, from different angles and distances/focal lengths, in order to provide all “coverage” of the scene that could be needed later in post-production.
And with that, we have reproduced all the main camera angles used in movies using an AI image generation model as our camera!
Isn’t that something?
But let’s not forget that the camera angle is always playing off the camera being placed at a specific height…
And while eye-level is, without a doubt, the most commonly used camera height, we can create quite dramatic effects by simply playing with the height of the camera, in conjunction with any of the camera angles we studied above.
Depending on the specific shot you’re trying to compose, maybe a different camera height could make more sense!
Here is your cheatsheet of the most common camera heights used in cinema:
Eye-Level Height: Camera at average standing eye height. Neutral perspective.
Waist-Level Height: Camera around waist height. This height was traditionally used in Westerns, to show off the action of the pistols!
Knee-Level Height: Camera around knee height. Perfect for focusing on things happening at knee level or below.
Think about showing someone's feet walking through tall grass, a child interacting with something on a low table, a pet's perspective, or someone picking something up off the floor. It brings the viewer's eye down to that specific height.
Floor-Level Height: Camera very low, near the ground. Usually used to show the steps of the character, the tires of a car making contact with the pavement, etc.
High-Level Height: Camera significantly above eye level, perhaps on a balcony or building. This camera height pairs perfectly with those extreme high-angle shots we saw before.
Aerial Height: Camera positioned very high up, often from a plane, helicopter, or drone. This height is necessary for things like bird's-eye views.
And there you have it!
Time to add this new incredibly versatile tool to your visual storytelling toolset and start crafting your own amazing, movie-quality shots with the help of AI!
Next Friday, we’ll tackle together the final chapter when it comes to learning “the letters” of the Language of Visual Storytelling: Camera Movement!
See you then!
Leonardo
P. S. Sorry for failing to get this issue to you on time.
As you probably understand if you’ve been reading this newsletter, I put a lot of work into preparing each individual issue –usually more than a full day of work– and I’m not willing to sacrifice quality to meet a self-imposed deadline.
That would be silly on my part.
So, in order to avoid making you wait by your inbox in the future, I’ve decided to send this newsletter out on Tuesdays and Fridays at 10 A.M. EST.
This gives me a few extra hours to finish writing the newsletter, and helps me ensure you’ll receive it at the exact time I promised you you would.
P. P. S. As always, I humbly ask you to support my work by sharing Flawlessly Human with your friends and colleagues. THANK YOU!!